When it comes to maintaining a healthy smile, we often focus on routine cleanings, fillings, or even whitening treatments. But sometimes, teeth can suffer damage that requires a more robust solution. This is where dental crowns, or tooth cap, come into play. Whether from decay, injury, or wear and tear, certain conditions may leave your tooth too weak to function properly without additional support. In this post, we’ll explore five key signs that you might need a tooth cap and guide you through what to expect during the process.
Sign 1: Significant Tooth Decay
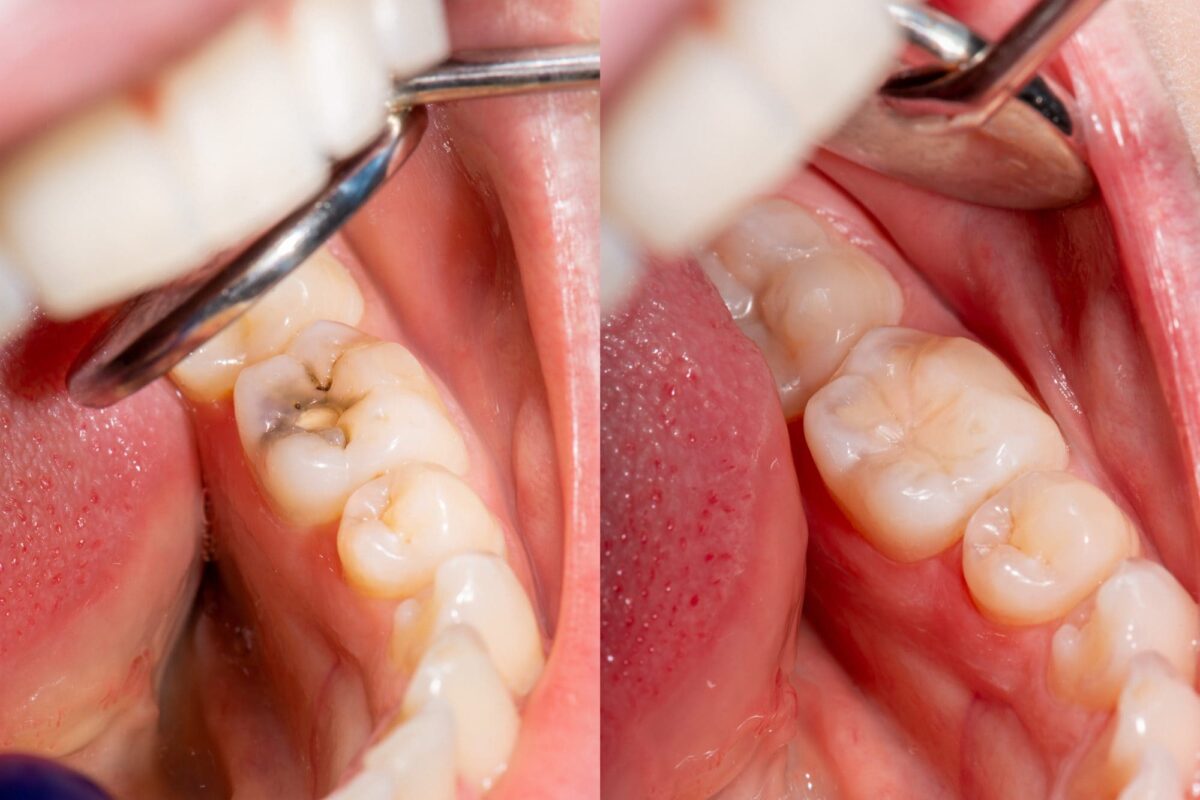
Significant tooth decay occurs when cavities or dental caries have progressed to the point where the tooth’s structure is severely compromised. Tooth decay starts when plaque—a sticky film of bacteria—builds up on the teeth. When you consume sugary or starchy foods, the bacteria in plaque produce acids that erode the tooth enamel, leading to cavities. If these cavities go untreated, the decay can spread deeper into the tooth, affecting the dentin and even the inner pulp, causing pain, sensitivity, and infection.
Why Significant Decay Require Tooth Cap (Crown):
When a tooth has experienced extensive decay, a filling may no longer be sufficient to restore its function and strength. Fillings are typically used for smaller cavities, but when decay destroys a large portion of the tooth, the remaining structure becomes too weak to support a filling. In such cases, a dental crown, or tooth cap, is necessary to protect the tooth and restore its full functionality.
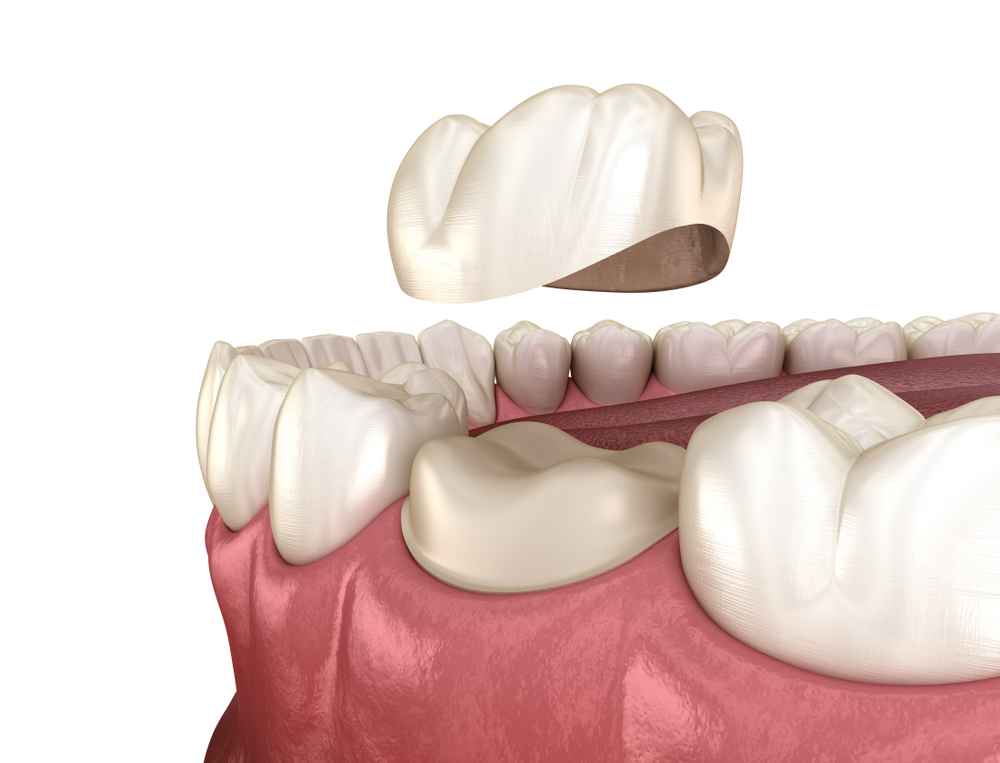
Tooth cap covers the entire visible portion of the tooth, acting as a protective shell that restores both its strength and appearance. It prevents the tooth from cracking or breaking under pressure and helps preserve the remaining healthy tooth structure.
What to Expect During Treatment for Significant Decay:
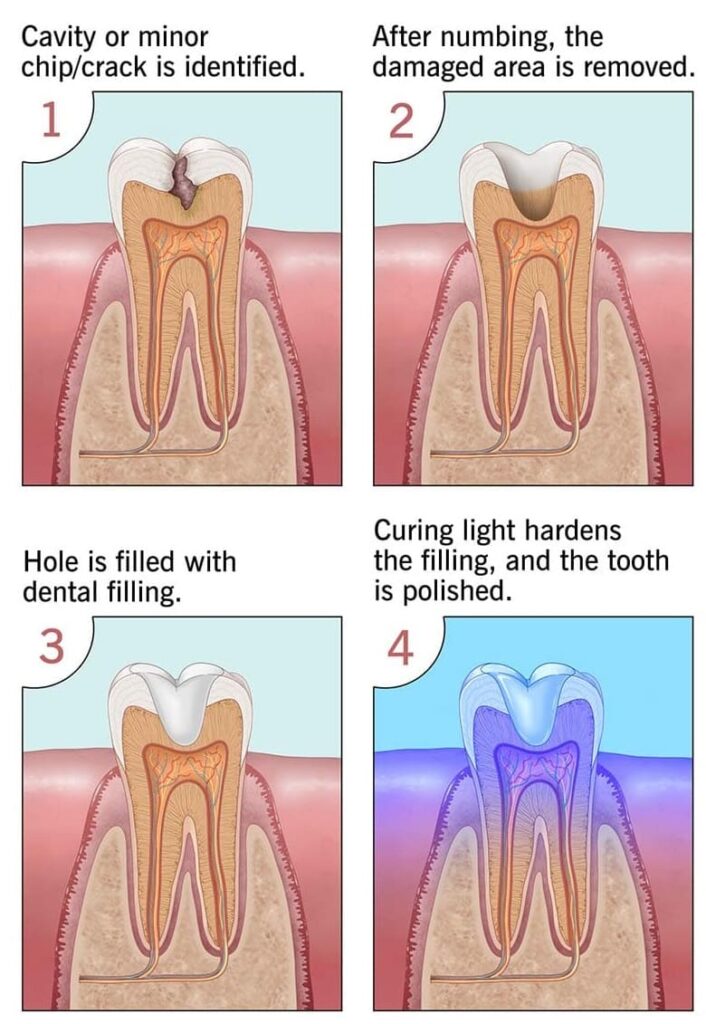
- Removing the Decayed Portion:
The dentist will begin by cleaning out the decayed tissue. This ensures that no infected material remains and prepares the tooth for the crown. - Shaping the Tooth:
Once the decay is removed, the tooth will be reshaped so that the crown can fit securely over it. In cases where a large portion of the tooth is missing, a core buildup may be done to restore enough structure to support the crown. - Impressions:
Impressions or digital scans will be taken to create a custom-made crown that fits perfectly over your tooth. Crowns are usually made of materials like porcelain, ceramic, or metal. - Temporary Crown:
While the permanent crown is being made, a temporary crown may be placed to protect the tooth. - Crown Placement:
Once the custom crown is ready, the dentist will cement it onto the tooth, ensuring it fits securely and matches the natural bite.
Benefits of a Tooth Cap for Significant Decay:
- Protection: A crown shields the weakened tooth from further decay or damage.
- Restoration: The crown restores the tooth’s function, allowing you to chew normally without discomfort.
- Aesthetics: Modern crowns are designed to match the color and shape of your natural teeth, improving the appearance of your smile.
- Longevity: Crowns are durable and can last many years with proper care, helping you avoid more invasive procedures like extractions or implants.
Sign 2: Cracked or Fractured Tooth
A cracked or fractured tooth is a common dental issue that can occur for various reasons, including biting down on hard objects, trauma to the face, or long-term habits like teeth grinding (bruxism). When a tooth cracks, it can cause pain or sensitivity, especially when chewing, drinking hot or cold beverages, or even exposing the tooth to air. If left untreated, a crack can worsen over time, potentially leading to infection, damage to the tooth’s root, or even complete tooth loss.
Types of Cracks or Fractures:
- Hairline Cracks (Craze Lines):
These are tiny cracks in the outer enamel of the tooth. They are often harmless and don’t cause pain, but they should still be monitored by a dentist. - Cracked Tooth:
A more serious condition where a crack extends from the chewing surface down toward the root. This can lead to pain while chewing and may require a dental crown to protect the tooth from breaking further. - Fractured Cusp:
This occurs when a piece of the tooth’s chewing surface breaks off. It often happens around a filling and usually doesn’t affect the pulp, but it may require a crown to restore the tooth’s structure and function. - Split Tooth:
A severe crack that splits the tooth into distinct parts. This often requires extraction, but in some cases, a crown may be used to save part of the tooth. - Vertical Root Fracture:
These cracks start at the root and extend upward. They may not cause symptoms until the surrounding bone or gum becomes infected, making treatment more complicated.
Why Tooth cap is Necessary:
A dental crown, or tooth cap, is often the best solution for a cracked or fractured tooth. The crown covers the entire tooth, holding it together and preventing the crack from spreading. It also restores the tooth’s strength, allowing it to function normally during chewing without the risk of further damage. Without a crown, the cracked tooth could continue to deteriorate, leading to more serious problems like infection or tooth loss.
What to Expect During Treatment:
- Assessment: The dentist will evaluate the severity of the crack and determine the best treatment. In some cases, a minor crack may only need bonding or a filling, but more serious fractures usually require a crown.
- Tooth Preparation: If a crown is needed, the dentist will reshape the tooth to ensure the crown fits securely over it.
- Impressions: Molds or digital scans of your tooth will be taken to create a custom-made crown that matches the shape and size of the damaged tooth.
- Temporary Crown: A temporary crown may be placed while the permanent crown is being made.
- Crown Placement: Once the custom crown is ready, it will be cemented onto the tooth, fully covering and protecting it from further damage.
Sign 3: Root Canal Treatment
A root canal treatment is performed when the inner part of a tooth, known as the pulp, becomes infected or severely damaged. This can happen due to deep decay, repeated dental procedures on the tooth, cracks, or trauma. The pulp contains nerves and blood vessels, so when it becomes infected, it can cause intense pain, sensitivity, and swelling. Left untreated, this infection can spread, leading to abscesses and even bone loss around the tooth.
During a root canal, the dentist or endodontist removes the infected pulp, cleans and disinfects the inside of the tooth, and fills it with a special material to prevent further infection. However, after a root canal, the tooth often becomes brittle and more prone to breaking because it no longer contains living tissue. To protect and restore the tooth, a dental crown is usually placed over it.
Tooth cap provides a strong, durable cover that allows the tooth to function normally while preventing it from cracking or fracturing under pressure. After root canal treatment, the dentist will prepare the tooth for a crown by reshaping it and taking impressions to ensure a custom fit. Once the permanent crown is ready, it’s cemented onto the tooth, providing long-term protection and restoring the tooth’s appearance and function.
Sign 4: Worn-Down Teeth from Grinding or Acid Erosion
Worn-down teeth can result from two main causes: teeth grinding (bruxism) and acid erosion. Both can significantly damage the enamel, leaving teeth vulnerable to further complications.
- Teeth Grinding (Bruxism):
Bruxism is the unconscious grinding or clenching of teeth, often during sleep. Over time, this constant pressure wears down the enamel, flattening the teeth and causing them to become shorter, more sensitive, and more prone to cracking. Bruxism can also lead to jaw pain, headaches, and even temporomandibular joint (TMJ) disorders. The loss of enamel makes the teeth less effective at chewing and more vulnerable to damage. - Acid Erosion:
Acid erosion occurs when acids from certain foods, drinks, or stomach acid (due to conditions like acid reflux or GERD) wear away the tooth’s protective enamel. This erosion leads to thinning enamel, increased tooth sensitivity, and a higher risk of decay. The teeth may take on a yellowish appearance as the underlying dentin becomes exposed.
In both cases, once the enamel is significantly worn down, the teeth may become too weak to perform their normal functions without intervention. This is where tooth cap come in. Crowns are used to restore the shape, size, and function of worn-down teeth, providing a durable, protective covering that can withstand chewing forces.
What to Expect with Dental Crowns for Worn-Down Teeth:
- Evaluation: The dentist will assess the extent of the wear or erosion.
- Tooth Preparation: The worn-down tooth will be reshaped to allow for the crown to fit properly.
- Custom Crown Creation: Impressions will be taken to create a custom-made crown that fits the tooth perfectly, restoring its original size and shape.
- Placement: Once the crown is ready, it will be cemented onto the tooth, providing long-term protection and restoring both function and aesthetics.
In the case of bruxism, the dentist may also recommend a night guard to prevent further grinding and protect the new crowns. For acid erosion, managing the underlying cause (such as diet changes or treating acid reflux) is key to preventing future damage.
Sign 5: Large or Failing Fillings
Large or failing fillings are a common reason why a tooth may need a crown. Over time, fillings—especially large ones—can weaken and compromise the structure of the tooth. Fillings are typically used to restore teeth after cavities, but when a cavity is large, the remaining tooth structure may not be strong enough to support the filling over the long term. As a result, the tooth can become prone to cracks, fractures, or further decay.
Why Large Fillings May Fail:
- Tooth Structure Weakness:
Large fillings leave less of the original tooth, which can weaken the tooth’s ability to withstand the pressures of chewing. Over time, the tooth may start to crack or break around the filling. - Filling Material Deterioration:
Fillings, especially amalgam (metal) ones, can wear down, expand, or shrink over time due to temperature changes in the mouth. This can create small gaps between the filling and the tooth, allowing bacteria to enter and cause decay under the filling, which weakens the tooth further. - Fractures or Chips:
As the filling ages, the tooth may become more brittle and susceptible to fractures, especially if the filling takes up a large portion of the tooth. A crack in the tooth can worsen without treatment, eventually leading to the need for more extensive dental work.
How Tooth cap Helps:
When a large or failing filling compromises the tooth’s integrity, a dental crown is often the best solution. A crown covers the entire tooth, providing a protective layer that holds the remaining tooth structure together and prevents further damage. Unlike a filling, which only fills a portion of the tooth, a crown reinforces the tooth as a whole, restoring its strength and durability.
What to Expect:
- Assessment: The dentist will examine the filling and surrounding tooth to determine if a crown is necessary.
- Removal of the Filling: If the filling has failed or if the tooth structure is weak, the old filling may be removed, and the tooth will be cleaned and prepared for a crown.
- Tooth Shaping: The tooth will be reshaped to ensure the crown fits securely over it.
- Temporary Crown: A temporary crown may be placed while the permanent one is custom-made to fit your tooth perfectly.
- Permanent Crown Placement: Once the crown is ready, it will be cemented onto the prepared tooth, restoring both the function and appearance of the tooth.
Conclusion
In conclusion, recognizing the signs that you may need tooth cap is essential for maintaining your oral health and preventing further complications. Whether it’s significant tooth decay, a cracked or fractured tooth, root canal treatment, worn-down teeth from grinding or acid erosion, or a large, failing filling, teeth caps can provide the protection and strength your tooth needs. By addressing these issues early, you can avoid more severe damage and ensure your smile stays healthy and functional.
If you’re experiencing any of the signs discussed, don’t hesitate to schedule a consultation with your dentist. They can evaluate your situation, recommend the best course of action, and guide you through the tooth cap process for a restored, pain-free smile.